• Support Home
  • Getting Started
    • Connecting Your Camera
    • 3rd Party Software Getting Started Guides
  • Tech Ref Manuals
    • Arena SDK Documentation
    • HTP003S – Helios2+ ToF 3D
    • HLT003S – Helios2 ToF 3D
    • HLS003S – Helios ToF 3D
    • HLF003S – Helios Flex ToF 3D
    • ATX245S – Atlas10 24.5 MP
    • ATX204S – Atlas10 20.4 MP
    • ATX162S – Atlas10 16.2 MP
    • ATX124S – Atlas10 12.3 MP
    • ATX081S – Atlas10 8.1 MP
    • ATX051S – Atlas10 5.0 MP
    • ATL314S – Atlas 31.4 MP
    • ATL196S – Atlas 19.6 MP
    • ATL168S – Atlas 16.8 MP
    • ATL120S – Atlas 12.3 MP
    • ATL089S – Atlas 8.9 MP
    • ATL071S – Atlas 7.1 MP
    • ATL050S – Atlas 5.0 MP
    • ATL028S – Atlas 2.8 MP
    • ATP200S – Atlas IP67 20 MP
    • ATP120S – Atlas IP67 12.3 MP
    • ATP089S -Atlas IP67 8.9 MP
    • ATP071S – Atlas IP67 7.1 MP
    • ATP028S – Atlas IP67 2.8 MP
    • TRI200S – Triton 20.0 MP
    • TRI120S – Triton 12.3 MP
    • TRI122S – Triton 12.2 MP
    • TRI089S – Triton 8.9 MP
    • TRI071S – Triton 7.1 MP
    • TRI064S – Triton 6.3 MP
    • TRI054S – Triton 5.4 MP
    • TRI050S-P/Q – Triton 5.0 MP Polarized
    • TRI050S – Triton 5.0 MP
    • TRI032S – Triton 3.2 MP
    • TRI028S – Triton 2.8 MP
    • TRI023S – Triton 2.3 MP
    • TRI016S – Triton 1.6 MP
    • TRI005S – Triton 0.5 MP
    • TRI004S – Triton 0.4 MP
    • TRI02KA – Triton 2K Line Scan
    • PHX200S – Phoenix 20.0 MP
    • PHX120S – Phoenix 12.3 MP
    • PHX122S – Phoenix 12.2 MP
    • PHX089S – Phoenix 8.9 MP
    • PHX064S – Phoenix 6.3 MP
    • PHX050S-P/Q – Phoenix 5.0 MP Polarized
    • PHX050S – Phoenix 5.0 MP
    • PHX032S – Phoenix 3.2 MP
    • PHX023S – Phoenix 2.3 MP
    • PHX016S – Phoenix 1.6 MP
    • PHX004S – Phoenix 0.4 MP
  • Application Notes
    • Bandwidth Sharing in Multi-Camera Systems
    • Combine Helios 3D Point Cloud with RGB Color
    • I2C Support on LUCID Cameras
    • Using GPIO on LUCID Cameras
    • Using PTP & Scheduled Action Commands
    • Helios2 And Triton Synchronization
    • Product Change Notifications (PCN)
  • Knowledge Base
  • Contact Support
  • Log In
  • Support Home
  • Getting Started
    • Connecting Your Camera
    • 3rd Party Software Getting Started Guides
  • Tech Ref Manuals
    • Arena SDK Documentation
    • HTP003S – Helios2+ ToF 3D
    • HLT003S – Helios2 ToF 3D
    • HLS003S – Helios ToF 3D
    • HLF003S – Helios Flex ToF 3D
    • ATX245S – Atlas10 24.5 MP
    • ATX204S – Atlas10 20.4 MP
    • ATX162S – Atlas10 16.2 MP
    • ATX124S – Atlas10 12.3 MP
    • ATX081S – Atlas10 8.1 MP
    • ATX051S – Atlas10 5.0 MP
    • ATL314S – Atlas 31.4 MP
    • ATL196S – Atlas 19.6 MP
    • ATL168S – Atlas 16.8 MP
    • ATL120S – Atlas 12.3 MP
    • ATL089S – Atlas 8.9 MP
    • ATL071S – Atlas 7.1 MP
    • ATL050S – Atlas 5.0 MP
    • ATL028S – Atlas 2.8 MP
    • ATP200S – Atlas IP67 20 MP
    • ATP120S – Atlas IP67 12.3 MP
    • ATP089S -Atlas IP67 8.9 MP
    • ATP071S – Atlas IP67 7.1 MP
    • ATP028S – Atlas IP67 2.8 MP
    • TRI200S – Triton 20.0 MP
    • TRI120S – Triton 12.3 MP
    • TRI122S – Triton 12.2 MP
    • TRI089S – Triton 8.9 MP
    • TRI071S – Triton 7.1 MP
    • TRI064S – Triton 6.3 MP
    • TRI054S – Triton 5.4 MP
    • TRI050S-P/Q – Triton 5.0 MP Polarized
    • TRI050S – Triton 5.0 MP
    • TRI032S – Triton 3.2 MP
    • TRI028S – Triton 2.8 MP
    • TRI023S – Triton 2.3 MP
    • TRI016S – Triton 1.6 MP
    • TRI005S – Triton 0.5 MP
    • TRI004S – Triton 0.4 MP
    • TRI02KA – Triton 2K Line Scan
    • PHX200S – Phoenix 20.0 MP
    • PHX120S – Phoenix 12.3 MP
    • PHX122S – Phoenix 12.2 MP
    • PHX089S – Phoenix 8.9 MP
    • PHX064S – Phoenix 6.3 MP
    • PHX050S-P/Q – Phoenix 5.0 MP Polarized
    • PHX050S – Phoenix 5.0 MP
    • PHX032S – Phoenix 3.2 MP
    • PHX023S – Phoenix 2.3 MP
    • PHX016S – Phoenix 1.6 MP
    • PHX004S – Phoenix 0.4 MP
  • Application Notes
    • Bandwidth Sharing in Multi-Camera Systems
    • Combine Helios 3D Point Cloud with RGB Color
    • I2C Support on LUCID Cameras
    • Using GPIO on LUCID Cameras
    • Using PTP & Scheduled Action Commands
    • Helios2 And Triton Synchronization
    • Product Change Notifications (PCN)
  • Knowledge Base
  • Contact Support
  • Log In
home/Knowledge Base/Arena Software/Tonemapping images from LUCID’s TRI054S-CC IMX490

Tonemapping images from LUCID’s TRI054S-CC IMX490

2500 views 1 September 19, 2022 Updated on October 20, 2022

Introduction

The Triton TRI054S featuring the IMX490 (BSI) back-illuminated stacked CMOS sensor allows for simultaneous 120 dB HDR imaging and LED flicker mitigation. With the large 5.4 MP, 2880 x 1860 px resolution this camera enables wide-angle shooting in both daytime and nighttime for Advanced Driver Assistance Systems(ADAS) / Autonomous Driving. This camera model is also well suited for other applications that demand very high HDR imaging such as electrical fuse inspection; high contrast medical imaging; live visible welding analysis; as well as other ITS applications.

These instructions illustrate different tonemapping methods when using the 24-bit image from the TRI054S.

Equipment Used

  • Triton TRI054S-CC camera
  • Arena SDK v1.0.33.11
  • OpenCV 3.4.3

Background

The TRI054S-CC features a 24-bit ISP:
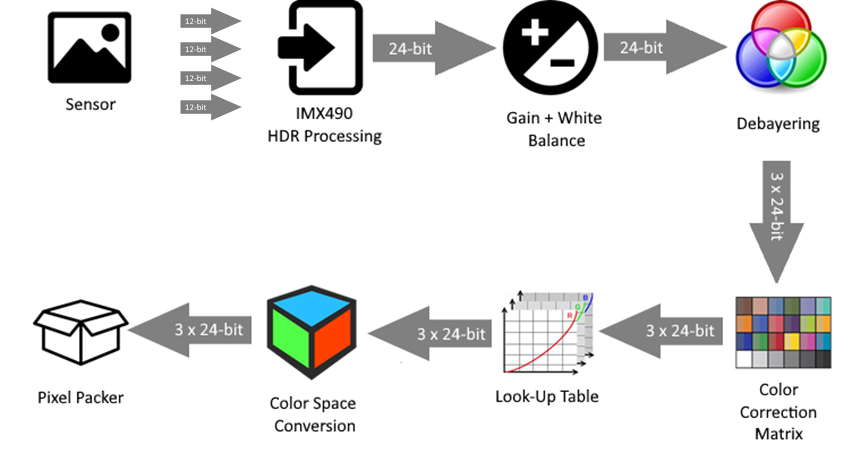
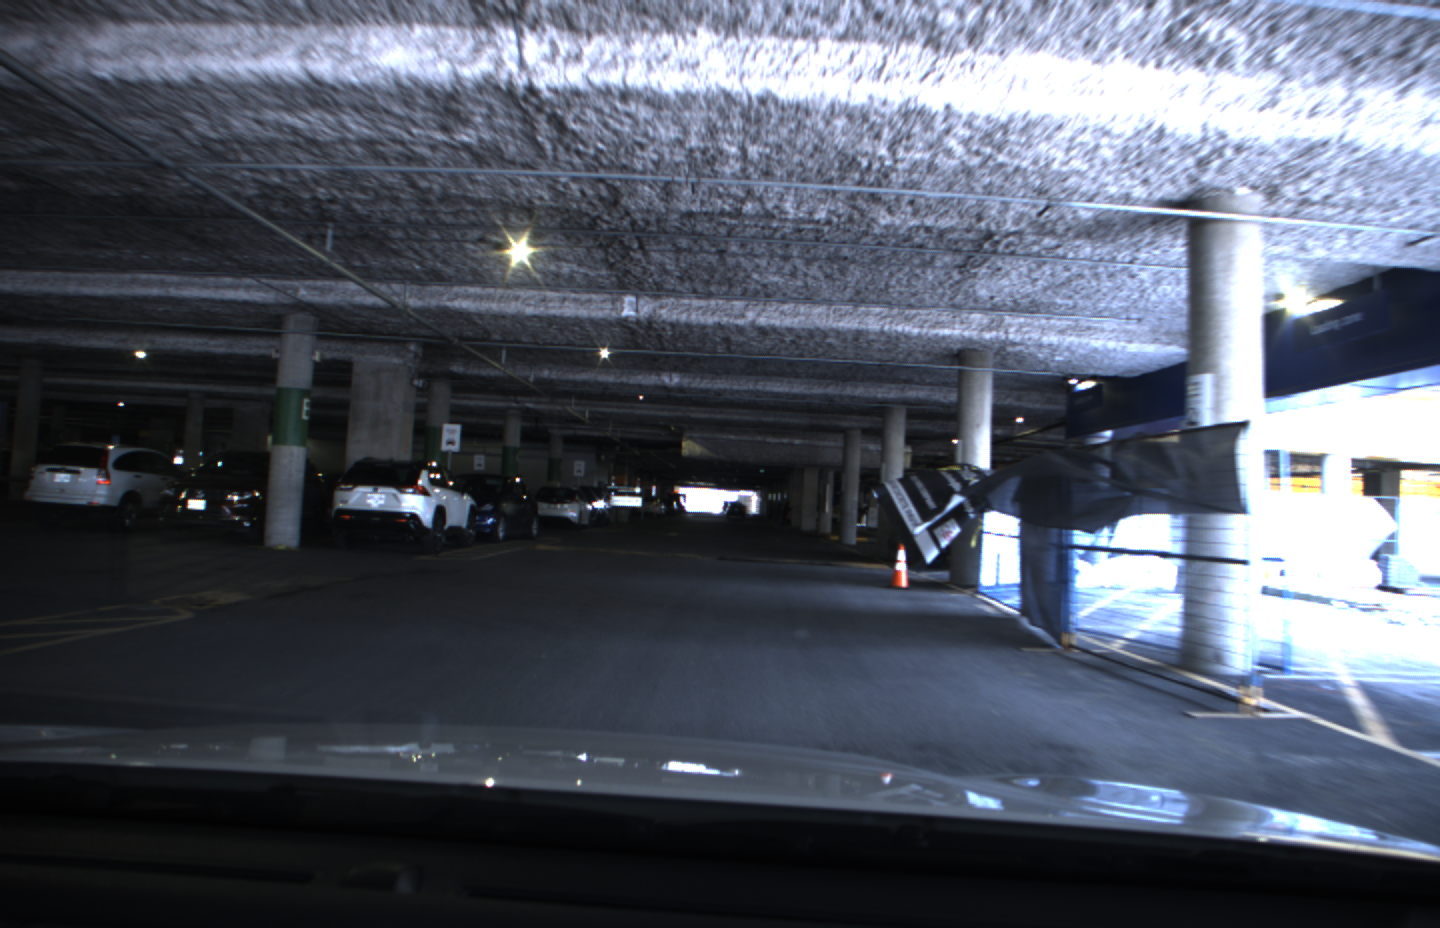
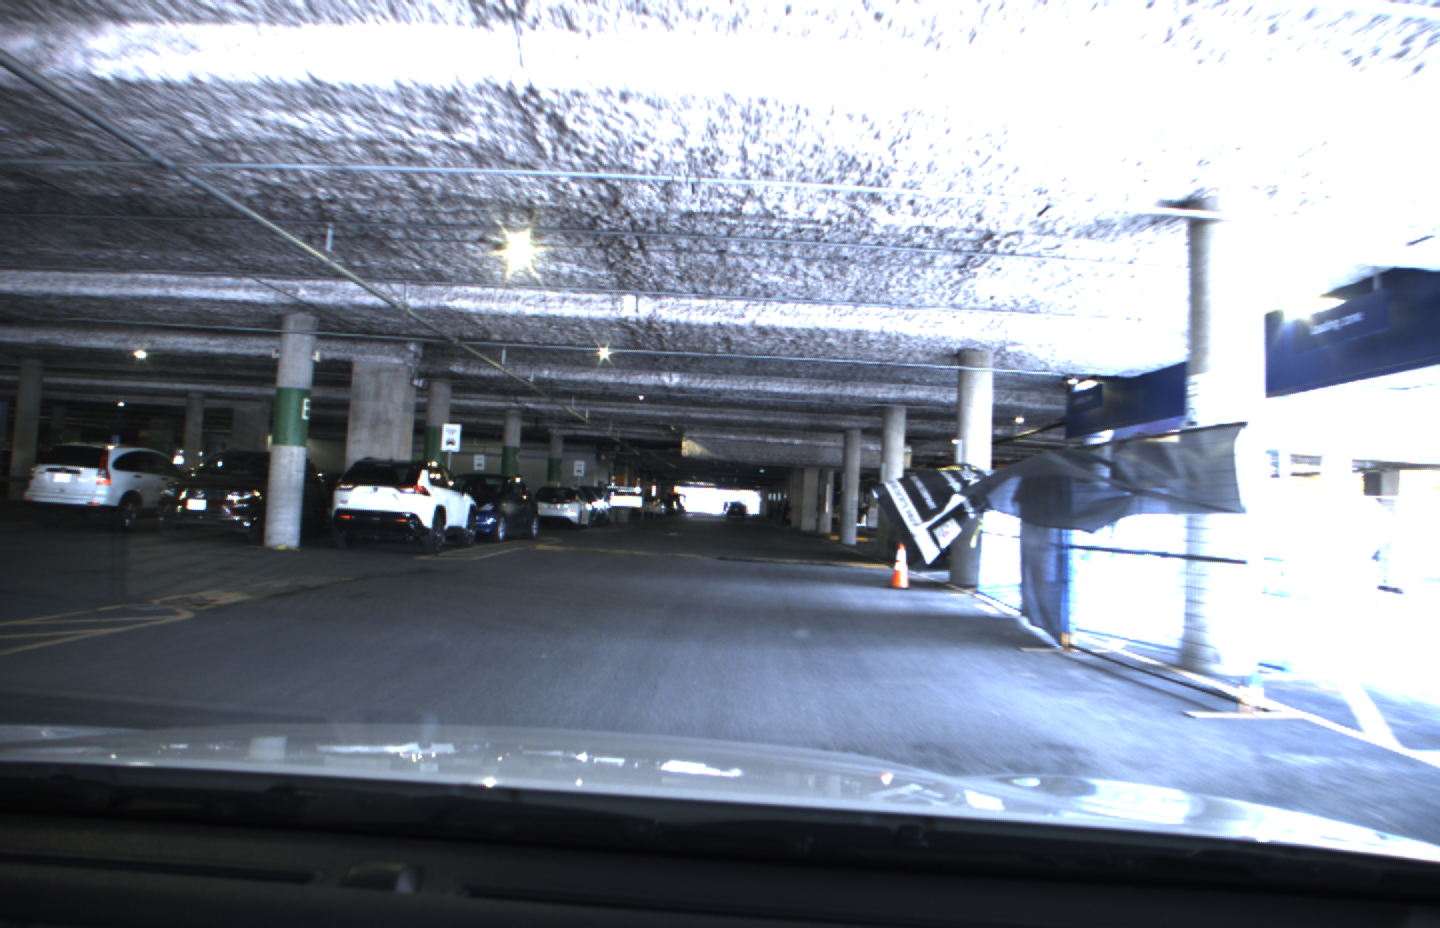
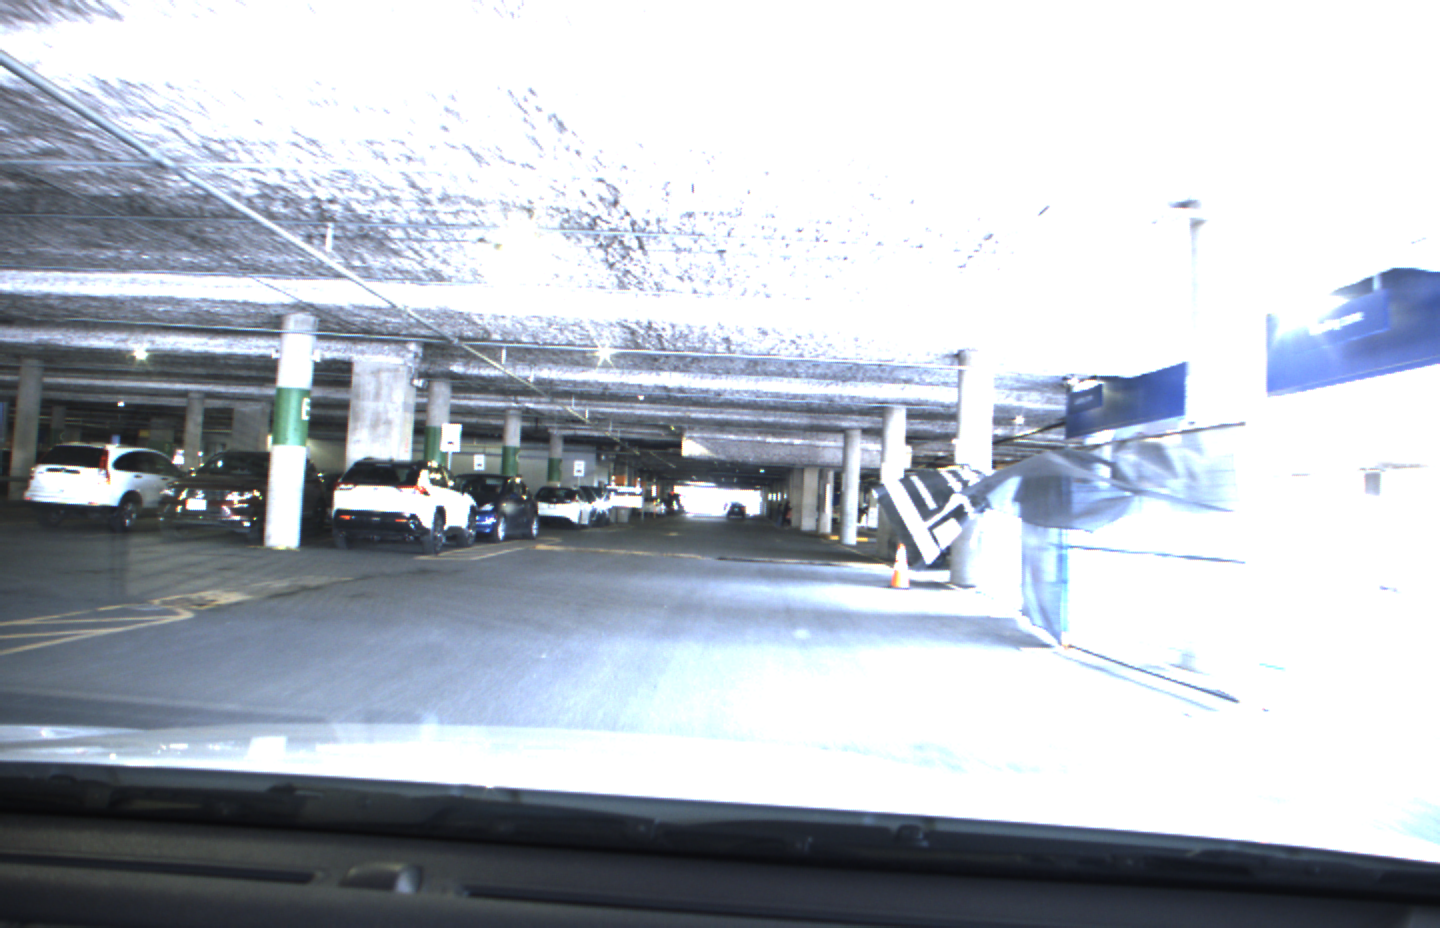
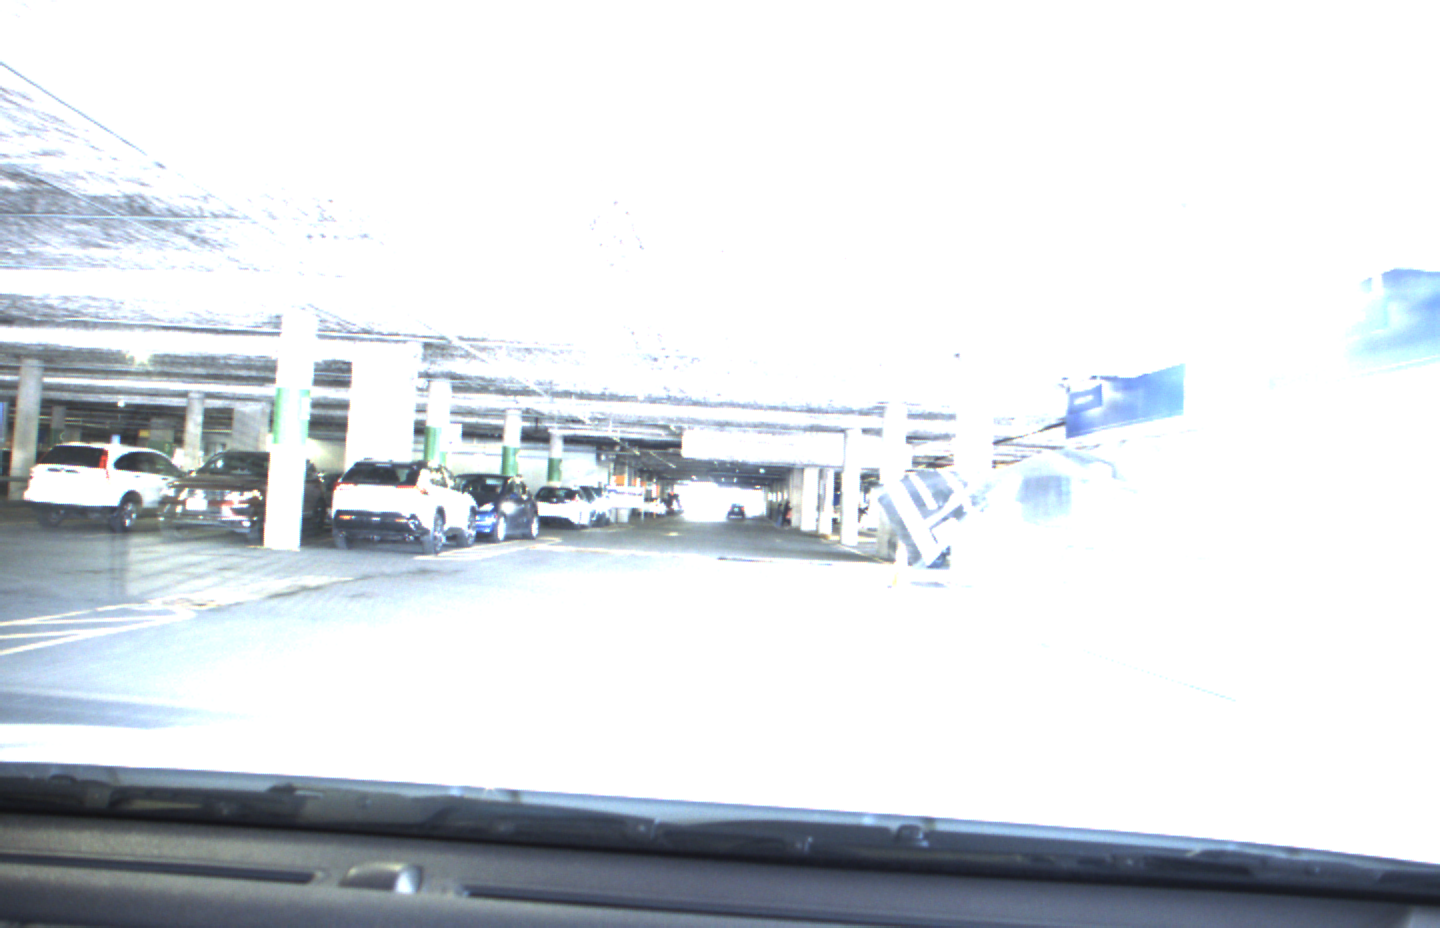
When using a 24-bit pixel format in ArenaView, you will be able to see 8-bits at a time for display.
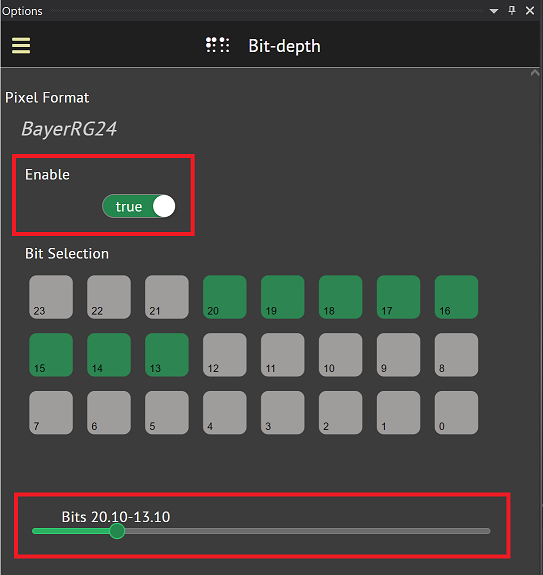
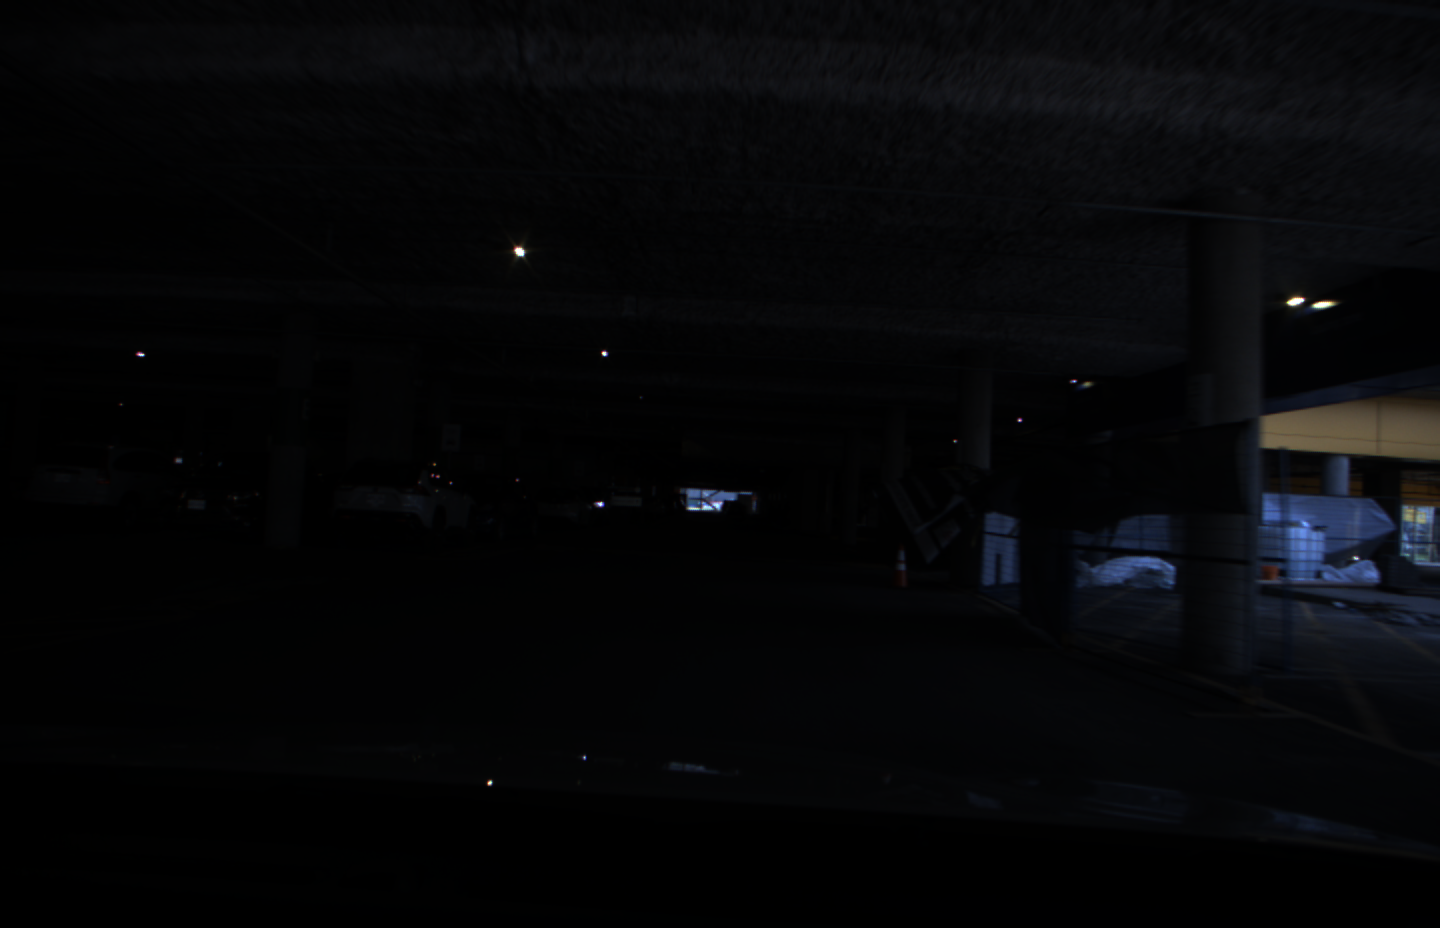
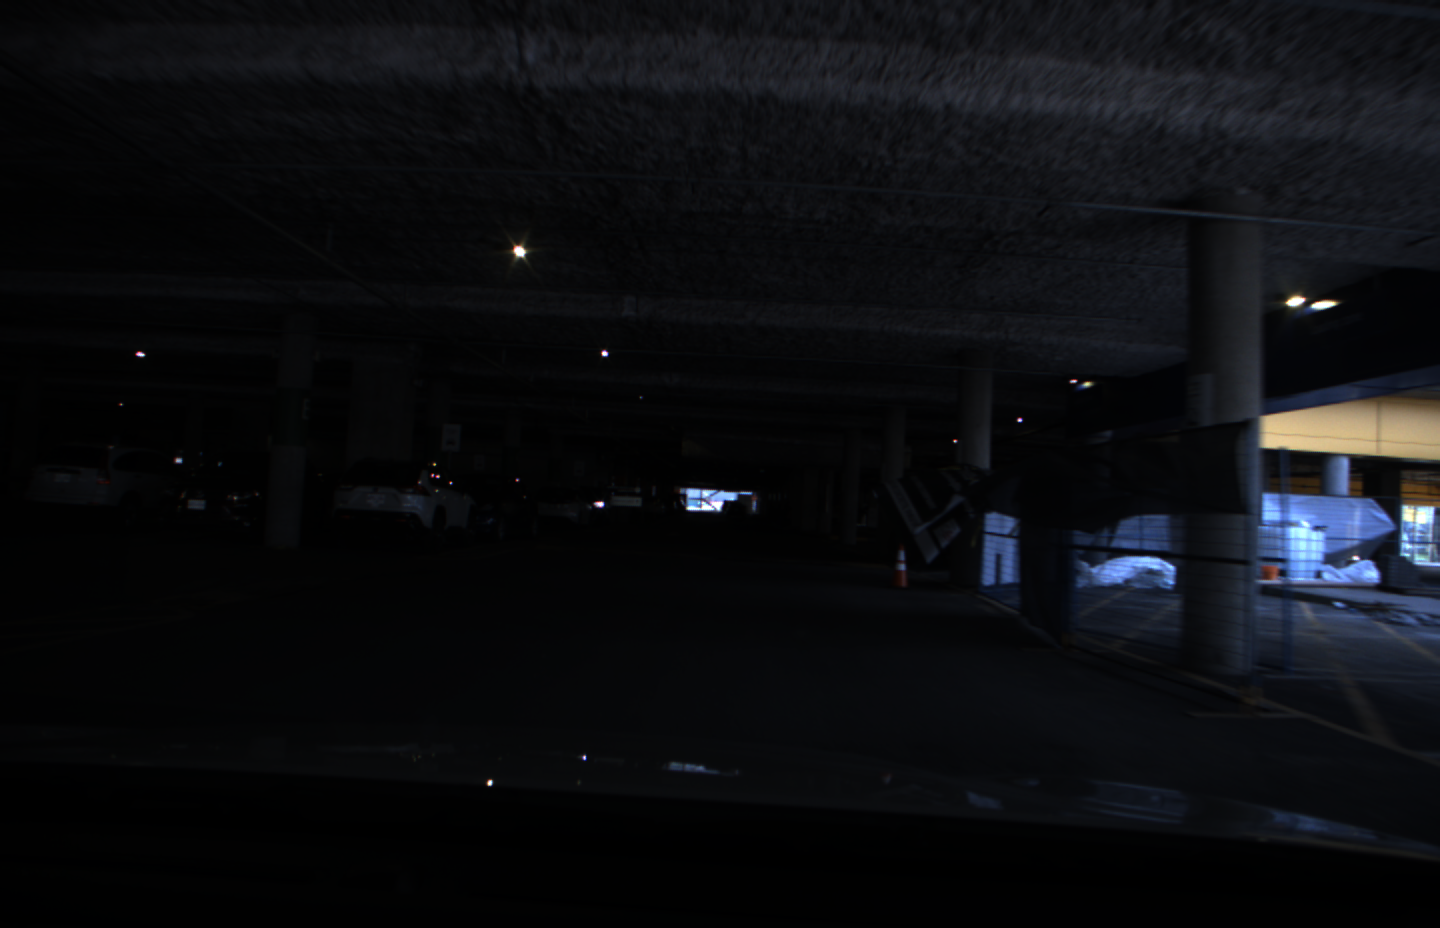
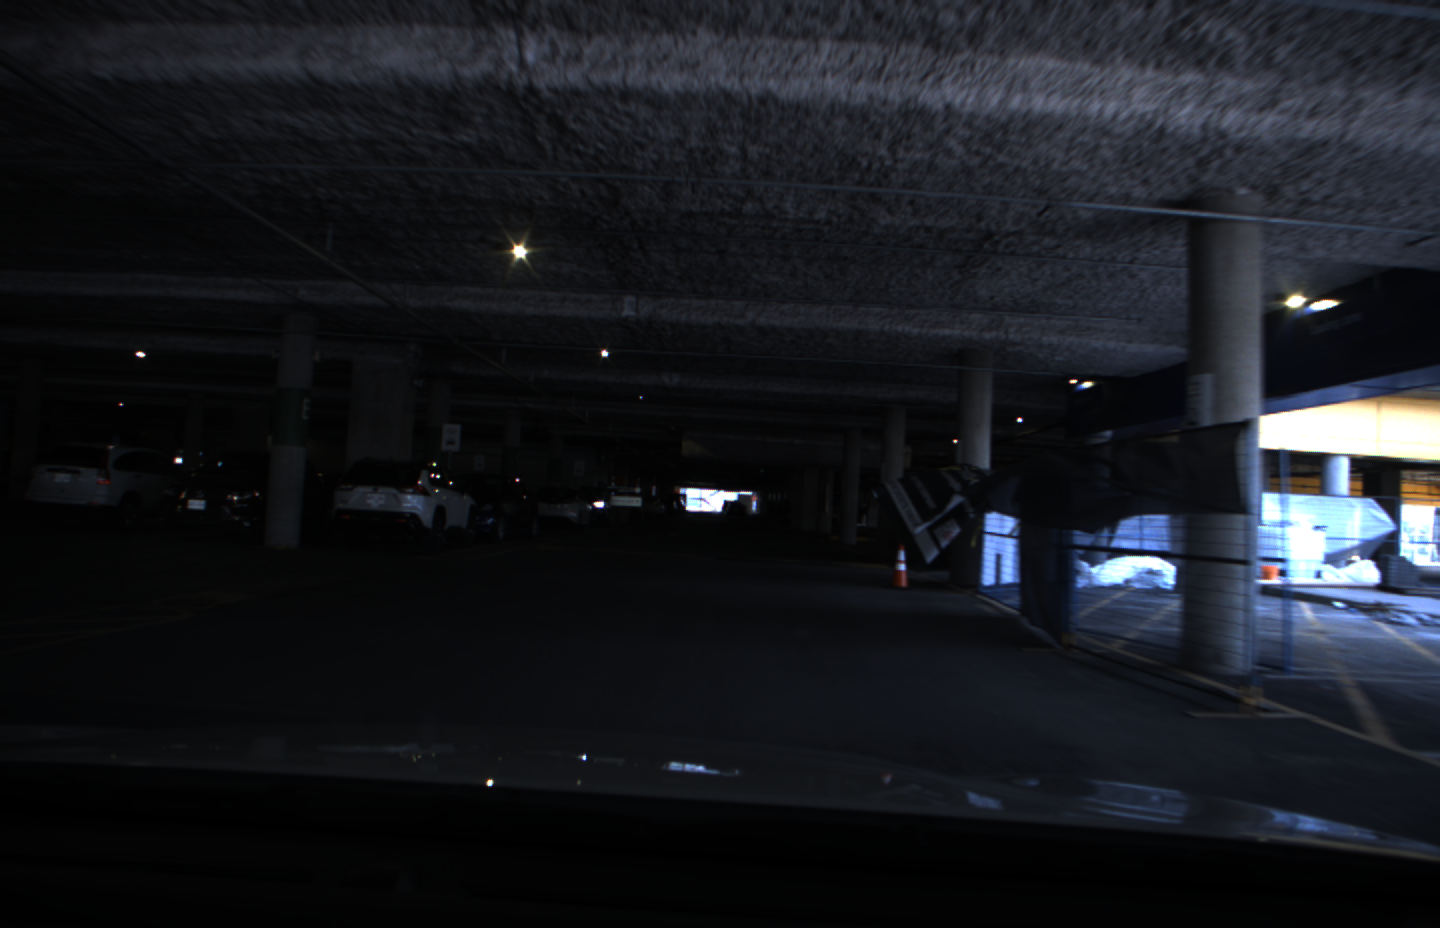
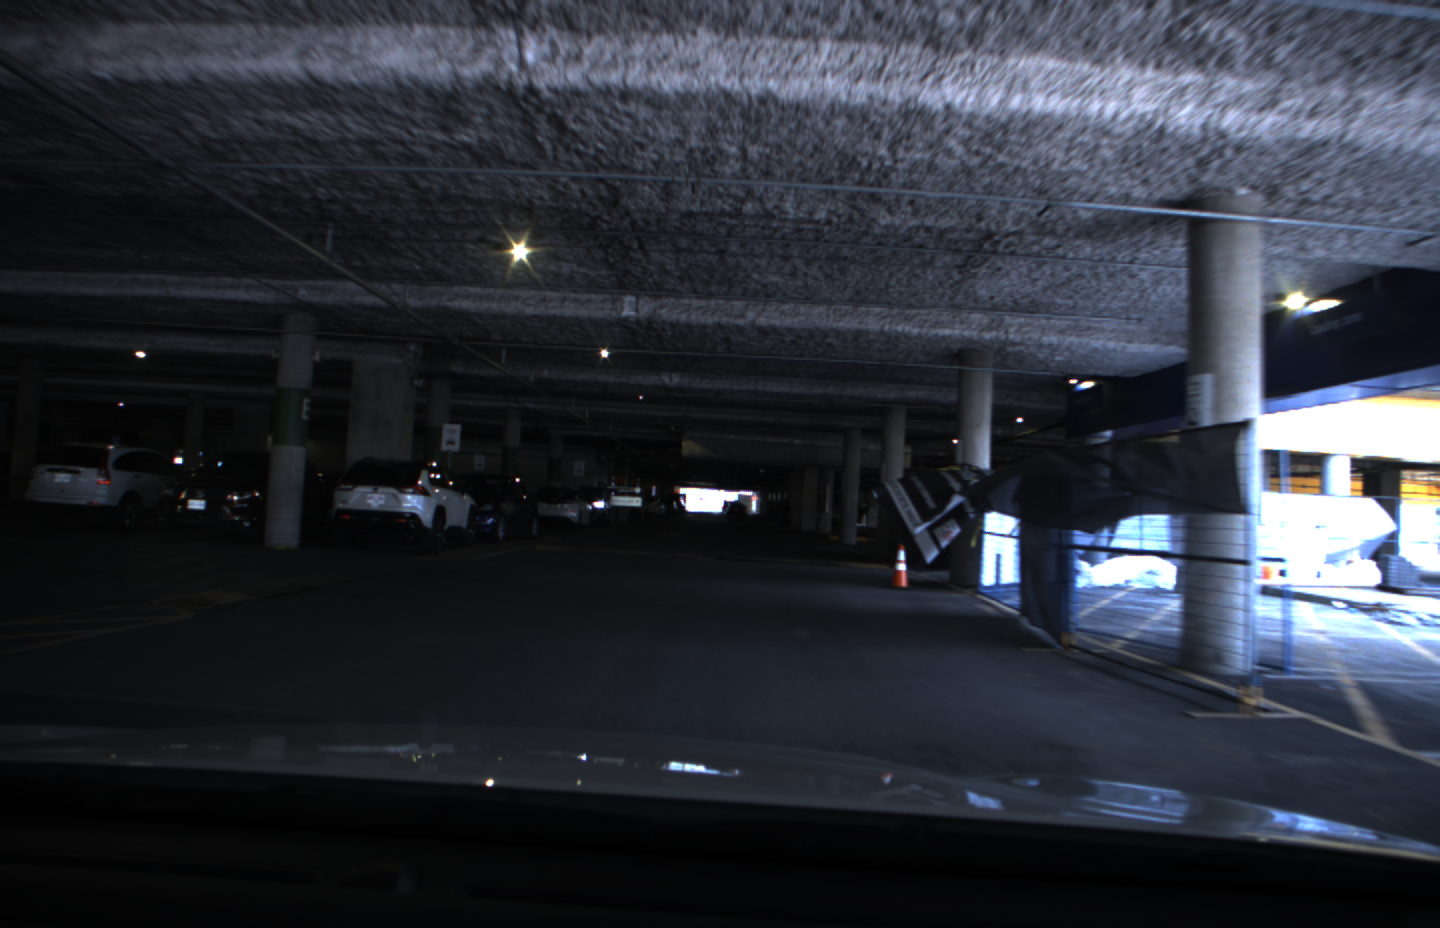
Consider the following image taken with the following settings:

  • Pixel Format: BayerRG24
  • Exposure Time: 10000
  • Width: 1440
  • Height: 928

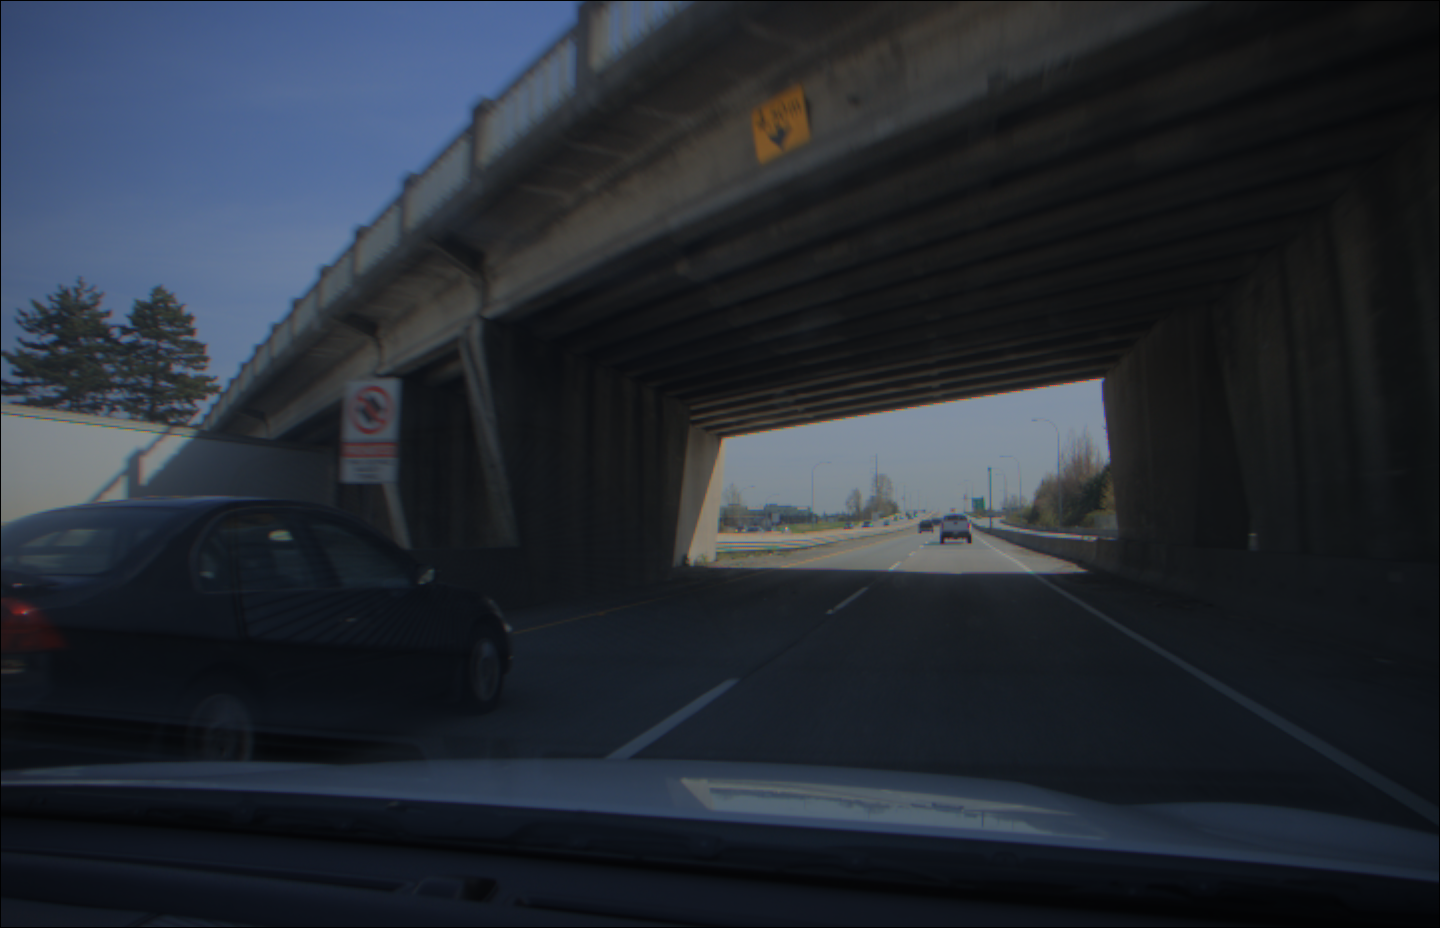
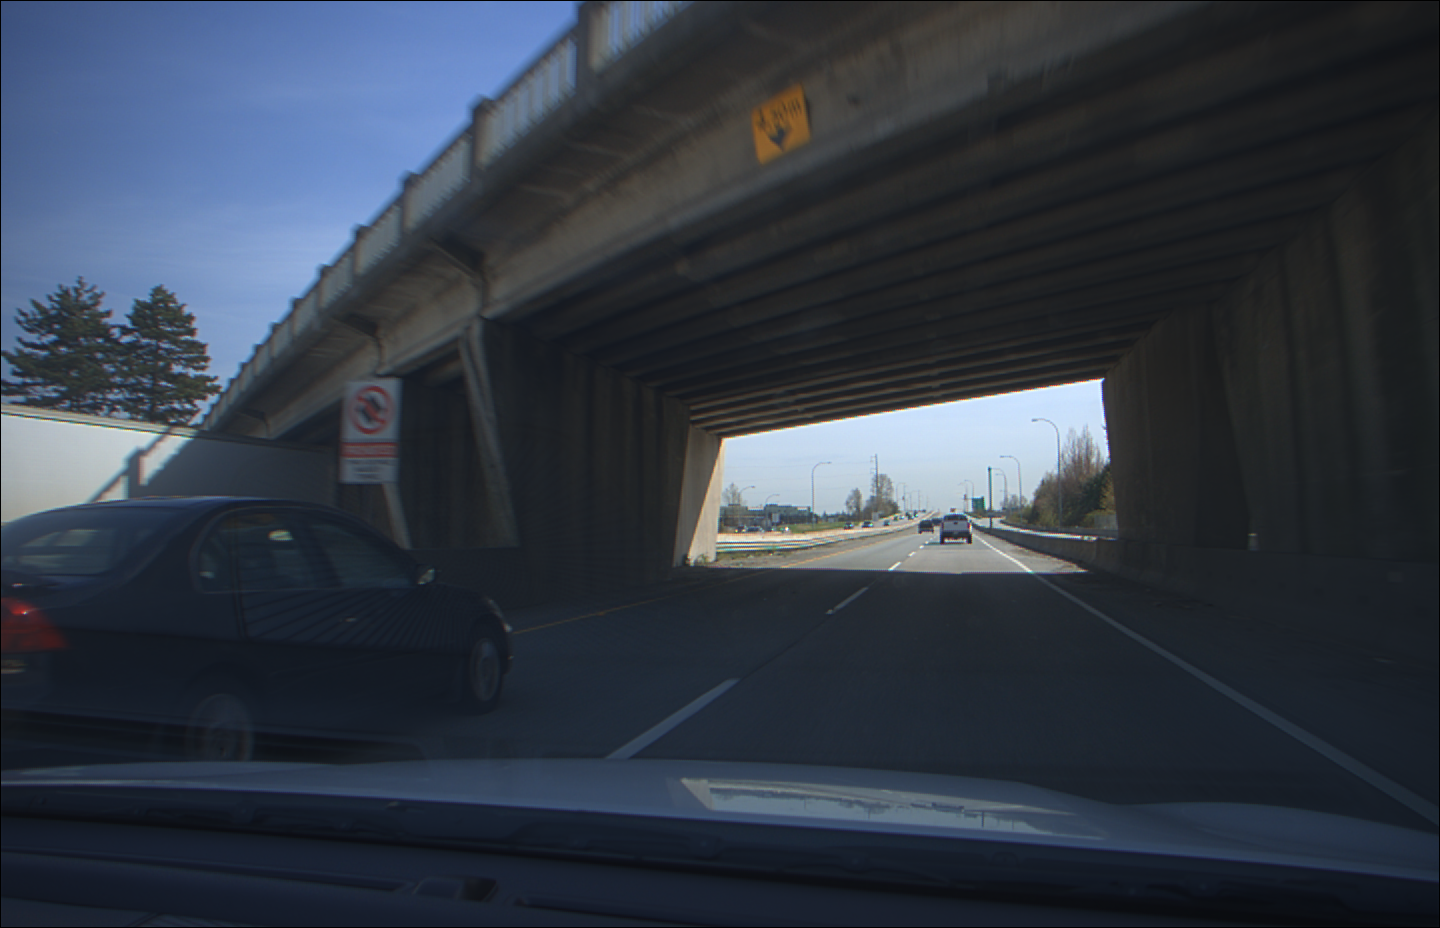
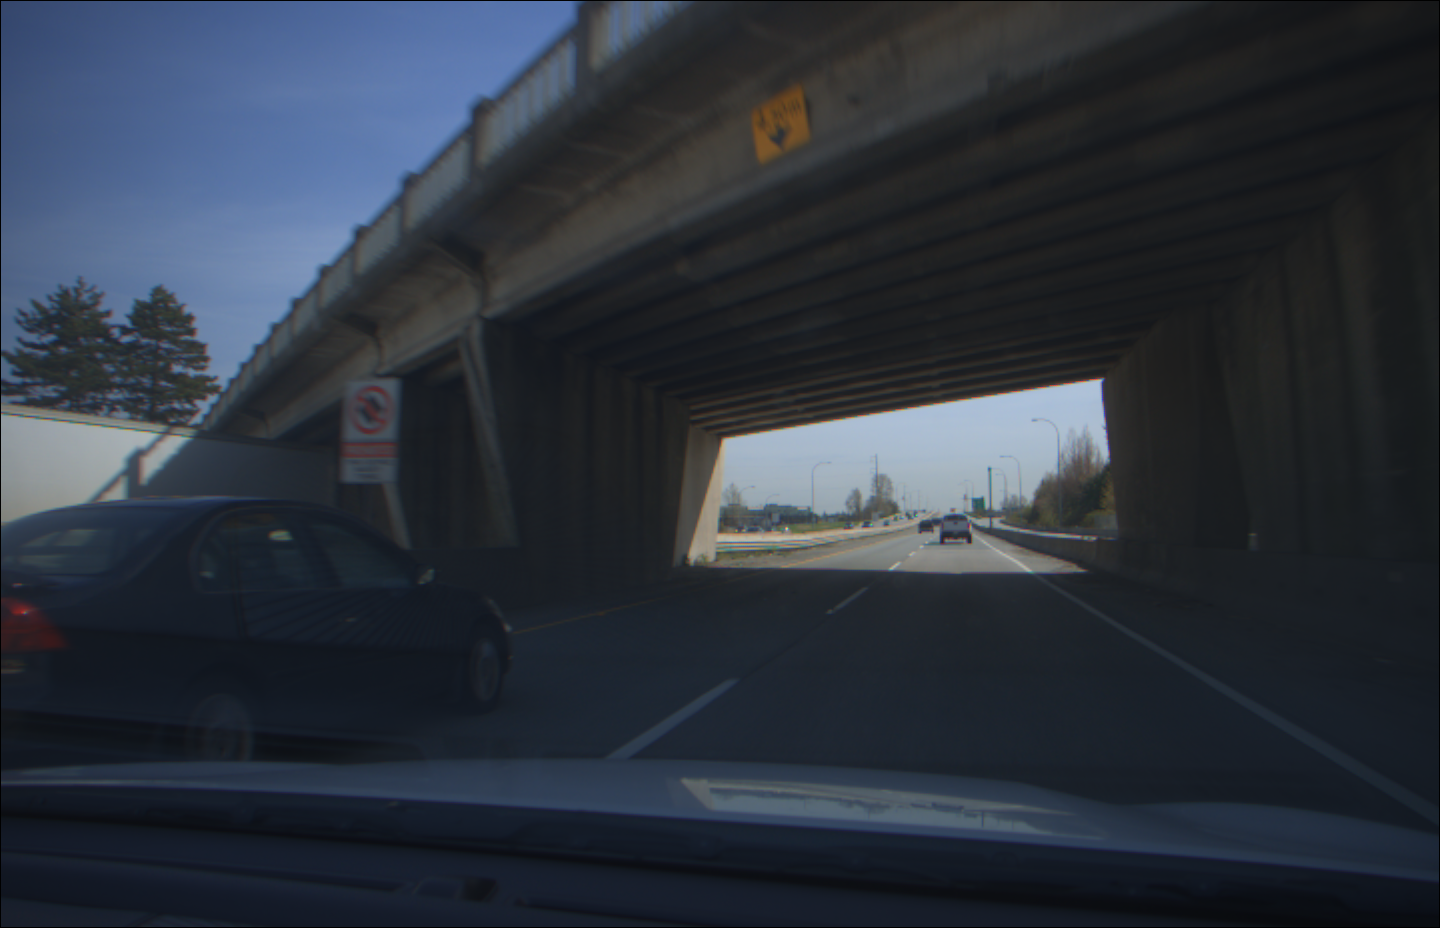
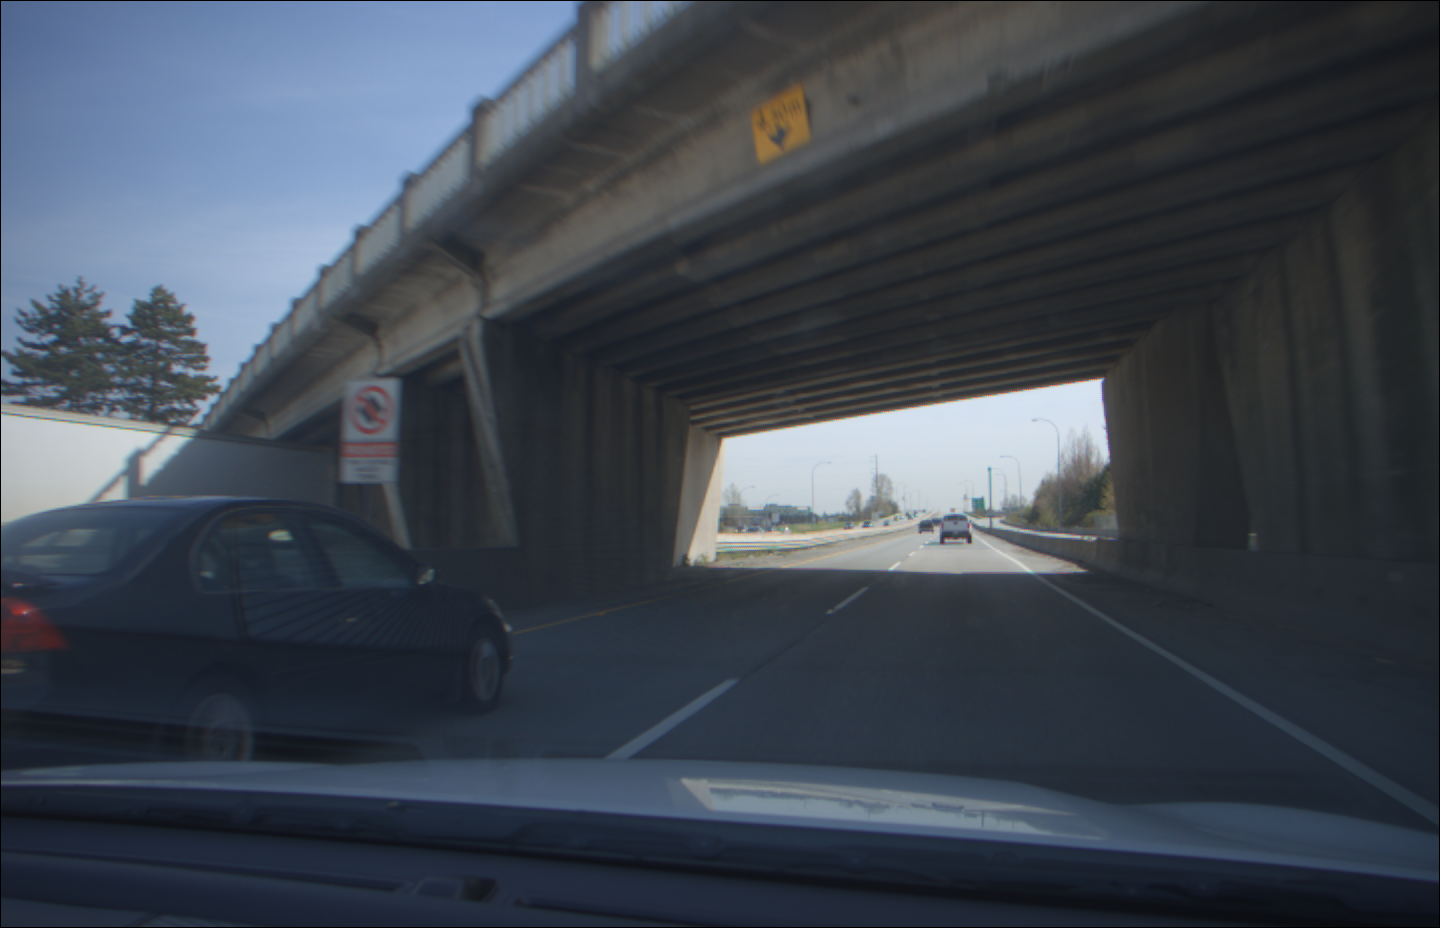
When you look at the image in ArenaView, you are only looking a specific 8-bit range from the 24-bit image:

In the above screenshots, we can see the camera was able to collect usable data, but we need to compare different ranges of bits to obtain more appropriate results.

Tonemapping with OpenCV

The 24-bit data can be leveraged in various tonemapping methods. This section will discuss some of the tonemapping methods offered by OpenCV 3.4.3:

https://docs.opencv.org/3.4.3/d8/d5e/classcv_1_1Tonemap.html

The following shows the example scene tonemapped with several OpenCV tonemapping methods:

TonemapDragoTonemapDurandTonemapMantiukTonemapReinhard

The tonemapping was applied to saved a raw image (post-processing).

Example Tonemapping Applications using OpenCV

Download the sample application for the TRI054S-CC here:

Awaiting product image

FILE: Cpp_TRI054S-CC_IMX490.zip (106.3MB)

Category: Uncategorized

The above download has the following applications:

Cpp_Triton_Recorder

This application will set the following parameters:

  • Stream Buffer Handling Mode = Oldest First
  • Pixel Format = BayerRG24
  • Color Transformation Enable = False
  • LUT Enable = False

As the camera streams, the application will display a scaled 8-bit image as well as an OpenCV-tonemapped image for visualization. In order to allow the OpenCV algorithms to use the image data, the data is expanded into 32-bit format.

Controls are provided to help fine-tune the parameters used for the OpenCV tonemapping algorithm. Upon pressing ‘r’ the application will record a raw frames to a file until ‘r’ is pressed again. The following controls are available:

KeyControl Description
tChange OpenCV tonemap algorithm
oShow text overlay on screen
.Increase Bit Range +1 in scaled image
,Decrease Bit Range -1 in scaled image
rStart/Stop recording a raw video
qQuit

Set your desired camera settings including Exposure Time before running this application. Typically, you will want the highest Exposure Time your scene allows while avoiding too much over-exposure in the higher bits and avoiding motion blur. 10ms or shorter may be required for automotive applications.

The scaled image and OpenCV-tonemapped display will become unavailable while recording data.

Cpp_Triton_OfflineProcessing

This application will open the raw video recorded by Cpp_Triton_Recorder for post-processing. To open the raw input, we must know at minimum the following parameters about the input:

  • Pixel Format
  • Width
  • Height

The application can load a raw video with the following parameters:

Cpp_Triton_OfflineProcessing.exe <filename> <pixel_format> <width> <height> <fps> <gamma=1.0> <v=export_video>
  • filename = filename of the raw video
  • pixel_format = pixel format of the images
  • width = width of the images
  • height = height of the images
  • fps = framerate of the video
  • gamma = gamma value to use for the OpenCV tonemapping algorithm (default = 1.0)
  • v = if this parameter is found, a post-processed (tonemapped) video is exported to file

The application will display a scaled 8-bit image as well as an OpenCV-tonemapped image for the current frame. Controls are provided to help fine-tune the parameters used for the OpenCV tonemapping algorithm. Upon pressing ‘v’, the application will export a tonemapped video from the recorded frames.

KeyControl Description
tChange OpenCV tonemap algorithm
rReset OpenCV tonemap parameters
oShow text overlay on screen
.Increase Bit Range +1 in scaled image
,Decrease Bit Range -1 in scaled image
[Navigate -1 frame
]Navigate +1 frame
;Navigate -100 frames
'Navigate +100 frames
sSave current frame to raw and png
'Export tonemapped video
qQuit

Was this helpful?

1 Yes  1 No
Related Articles
  • Solving driver-related RDMA streaming issues with Ubuntu 22.04
  • Using Multiple Helios Cameras Simultaneously
  • Troubleshooting Network Timeouts (Linux)
  • How to create an Ubuntu docker image and container with Arena SDK
  • Troubleshooting timeouts caused by incomplete images (Windows)
  • Using LUCID’s ArenaView with JupyterLab

Didn't find your answer? Contact Us

  Using LUCID’s ArenaView with JupyterLab

Troubleshooting timeouts caused by incomplete images (Windows)  

© 2024 LUCID Vision Labs Inc.
Looking to purchase our cameras?
Visit the LUCID Webstore at thinklucid.com
LUCID Support & Help
Welcome to LUCID

We use cookies to facilitate online purchases and analyze our traffic. By clicking "Accept", you consent to our use of cookies.

Functional Always active
The technical storage or access is strictly necessary for the legitimate purpose of enabling the use of a specific service explicitly requested by the subscriber or user, or for the sole purpose of carrying out the transmission of a communication over an electronic communications network.
Preferences
The technical storage or access is necessary for the legitimate purpose of storing preferences that are not requested by the subscriber or user.
Statistics
The technical storage or access that is used exclusively for statistical purposes. The technical storage or access that is used exclusively for anonymous statistical purposes. Without a subpoena, voluntary compliance on the part of your Internet Service Provider, or additional records from a third party, information stored or retrieved for this purpose alone cannot usually be used to identify you.
Marketing
The technical storage or access is required to create user profiles to send advertising, or to track the user on a website or across several websites for similar marketing purposes.
Manage options Manage services Manage {vendor_count} vendors Read more about these purposes
View preferences
{title} {title} {title}