Introduction
This article demonstrates how to enable Jumbo Frames (ie. set MTU / packet size to 9000) on the Raspberry 4. Enabling Jumbo Frames is necessary to unlock the full performance of LUCID cameras, however doing so on a Raspberry Pi involves recompiling the kernel. This article assumes the Raspberry Pi is running a 64-bit OS, which is needed for the ARM 64-bit version of Arena SDK.
The image for the 64-bit Raspberry Pi OS can be downloaded from: https://downloads.raspberrypi.org/raspios_arm64/images/, and installed with the Raspberry Pi Imager: https://www.raspberrypi.org/software/.
Preparation
Install the needed dependencies using the Terminal command:
sudo apt-get install gedit texinfo build-essential libgmp-dev libmpfr-dev libmpc-dev libisl-dev libssl-dev libncurses5-dev bc git-core bison flexBuild and install binutils using the commands:
wget https://ftp.gnu.org/gnu/binutils/binutils-2.34.tar.bz2tar xf binutils-2.34.tar.bz2mkdir binutils-objcd binutils-obj../binutils-2.34/configure --prefix=/opt/aarch64 --target=aarch64-linux-gnu --disable-nlsmake -j4sudo make installcd
To be able to use binutils directly, set the PATH using this command:
export PATH=$PATH:/opt/aarch64/bin/Build and install gcc using the commands:
wget https://ftp.gnu.org/gnu/gcc/gcc-8.4.0/gcc-8.4.0.tar.gztar xf gcc-8.4.0.tar.gzmkdir gcc-outcd gcc-out../gcc-8.4.0/configure --prefix=/opt/aarch64 --target=aarch64-linux-gnu --with-newlib --without-headers \--disable-nls --disable-shared --disable-threads --disable-libssp --disable-decimal-float \--disable-libquadmath --disable-libvtv --disable-libgomp --disable-libatomic \--enable-languages=cmake all-gcc -j4sudo make install-gcccd
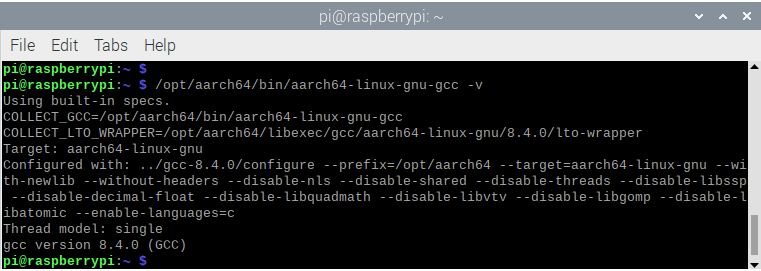
Use this command to test if gcc installed correctly:
/opt/aarch64/bin/aarch64-linux-gnu-gcc -vThe output of that command should be similar to:
Download Kernel Source
There are two options to download the Linux kernel source for Raspberry Pi.
Option 1
The first option is to pull a branch from: https://github.com/raspberrypi/linux.
As of writing, version 5.5 is the latest that will work with LUCID cameras. Later versions will not allow LUCID cameras to negotiate a higher packet size – we are still looking into this.
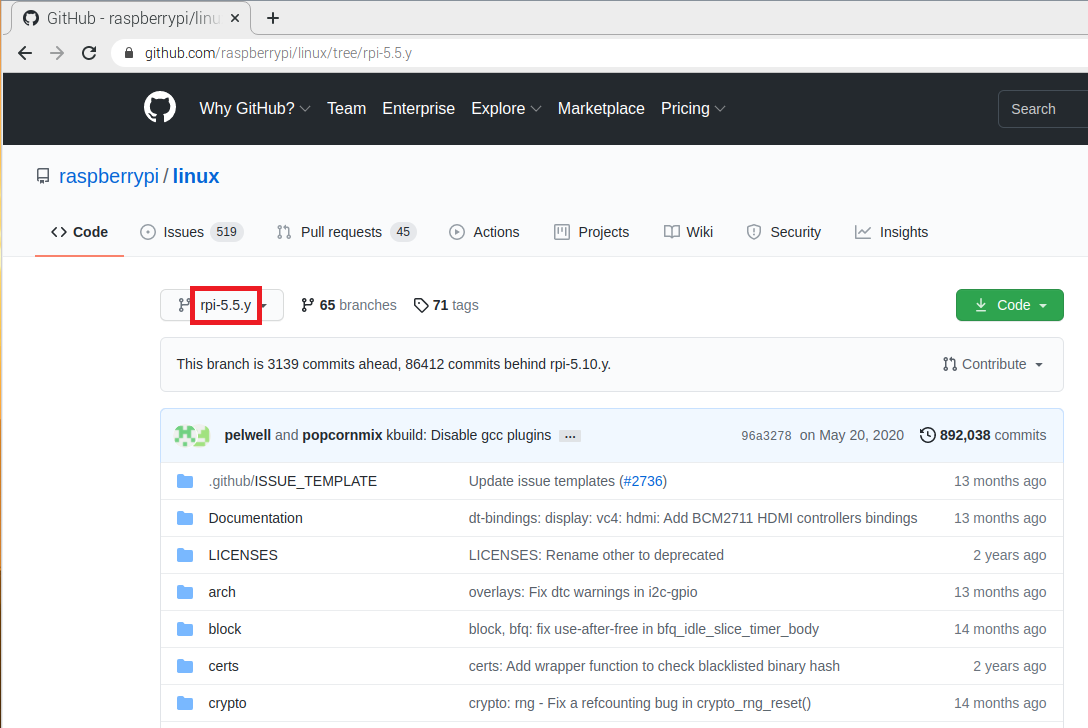
Clone and update the sources to the Raspberry Pi using the command:
git clone --depth=1 -b rpi-5.5.y https://github.com/raspberrypi/linux.gitThis will create a directory titled linux containing the source files. The benefit of this option is that the source can be updated by running this command from the linux directory:
git pullOption 2
The second option is to download a release folder from: https://github.com/raspberrypi/linux/releases.
Download the .tar.gz folder and save it to the /home/pi directory. As of writing, version 1.20210108-1 is the latest that will work with LUCID cameras. Later versions will not allow LUCID cameras to negotiate a higher packet size – we are still looking into this.
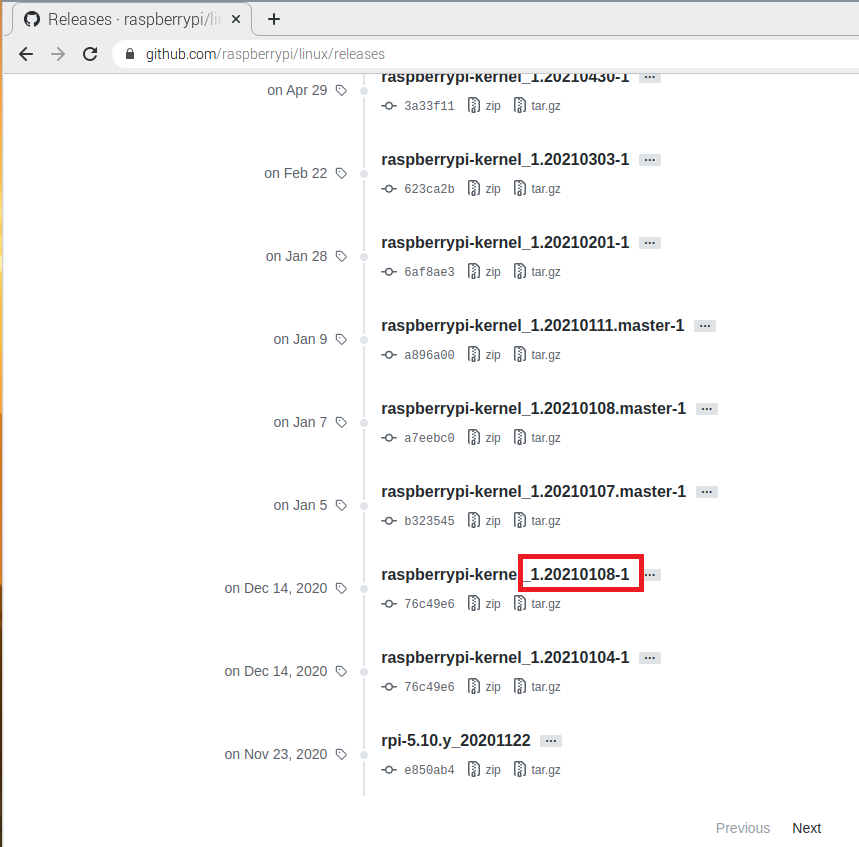
Extract the folder with the command:
tar xf raspberrypi-kernel_1.20210108-1.tar.gzAltering the Kernel Source Files
In File Manager, navigate to the directory /home/pi/linux/include/linux and open the file if_vlan.h. If Option 2 was used above, the directory will be /home/pi/linux-raspberrypi-kernel_1.20210108-1/include/linux.
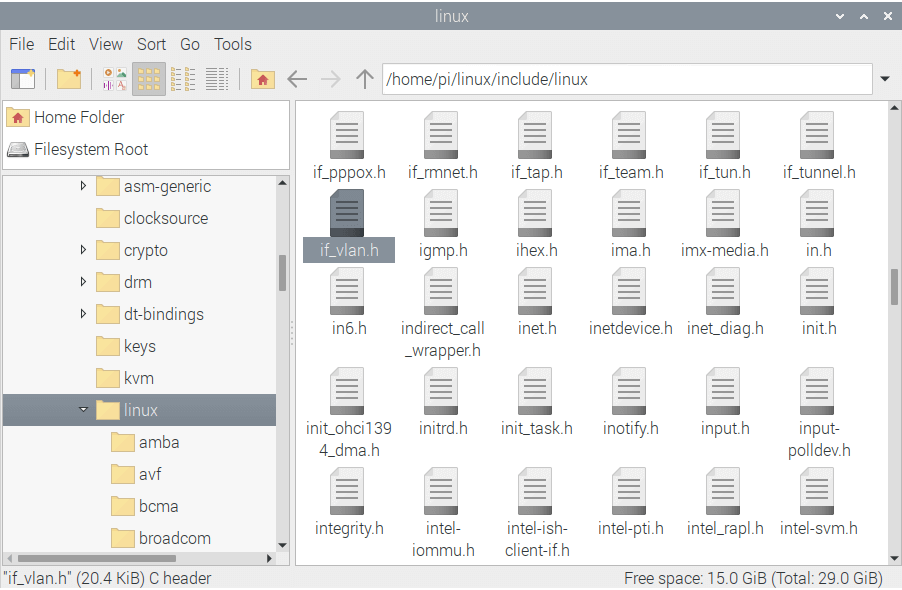
In if_vlan.h, change the lines:
#define VLAN_ETH_DATA_LEN 1500 /* Max. octets in payload */#define VLAN_ETH_FRAME_LEN 1518 /* Max. octets in frame sans FCS */
to:
#define VLAN_ETH_DATA_LEN 9000 /* Max. octets in payload */#define VLAN_ETH_FRAME_LEN 9018 /* Max. octets in frame sans FCS */
In File Manager, navigate to the directory /home/pi/linux/include/uapi/linux and open the file if_ether.h. If Option 2 was used earlier, the directory will be /home/pi/linux-raspberrypi-kernel_1.20210108-1/include/uapi/linux/.
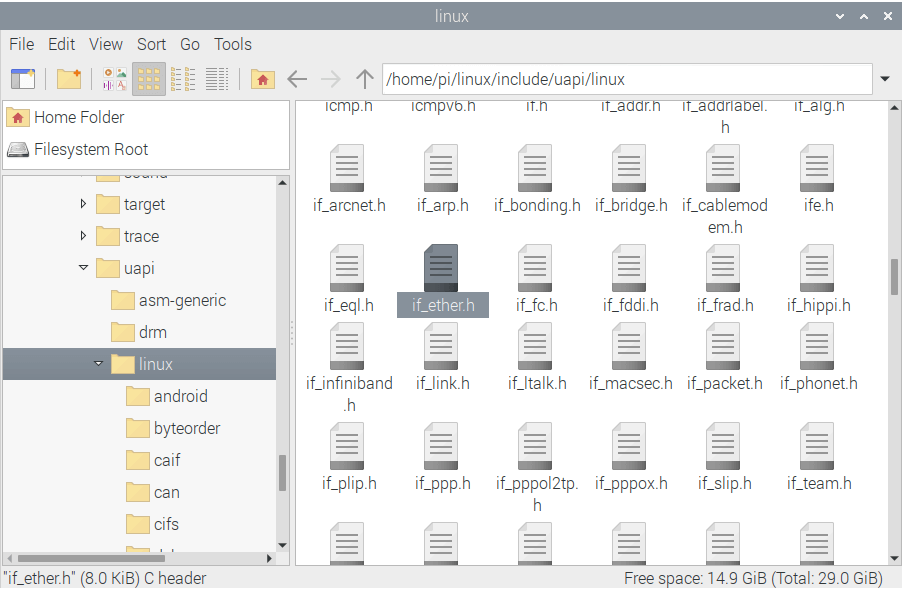
In if_ether.h, change the lines:
#define ETH_DATA_LEN 1500 /* Max. octets in payload */#define ETH_FRAME_LEN 1514 /* Max. octets in frame sans FCS */
to:
#define ETH_DATA_LEN 9000 /* Max. octets in payload */#define ETH_FRAME_LEN 9014 /* Max. octets in frame sans FCS */
In File Manager, navigate to the directory /home/pi/linux/drivers/net/ethernet/broadcom/genet and open the file bcmgenet.c. If Option 2 was used earlier, the directory will be /home/pi/linux-raspberrypi-kernel_1.20210108-1/drivers/net/ethernet/broadcom/genet/.
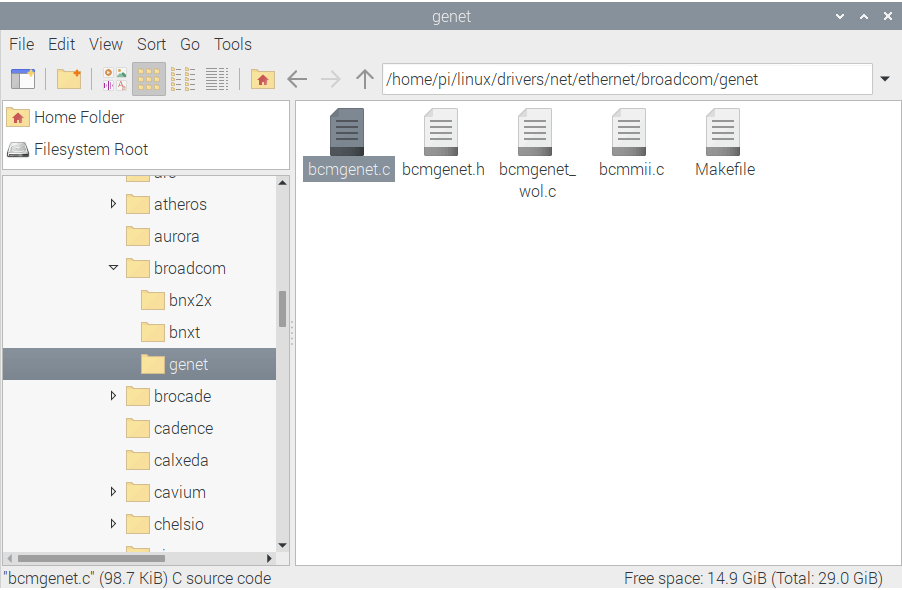
In bcmgenet.c, change the line:
#define RX_BUF_LENGTH 2048to:
#define RX_BUF_LENGTH 10240Configure & Build Kernel for 64-bit Raspberry Pi
In Terminal, run the commands:
mkdir kernel-outcd linuxmake O=../kernel-out/ ARCH=arm64 CROSS_COMPILE=/opt/aarch64/bin/aarch64-linux-gnu- bcm2711_defconfigmake -j4 O=../kernel-out/ ARCH=arm64 CROSS_COMPILE=aarch64-linux-gnu-
If Option 2 was used earlier, change to the linux-raspberrypi-kernel_1.20210108-1 directory, not linux.
Booting 64-bit Kernel
In Terminal, run the following commands:
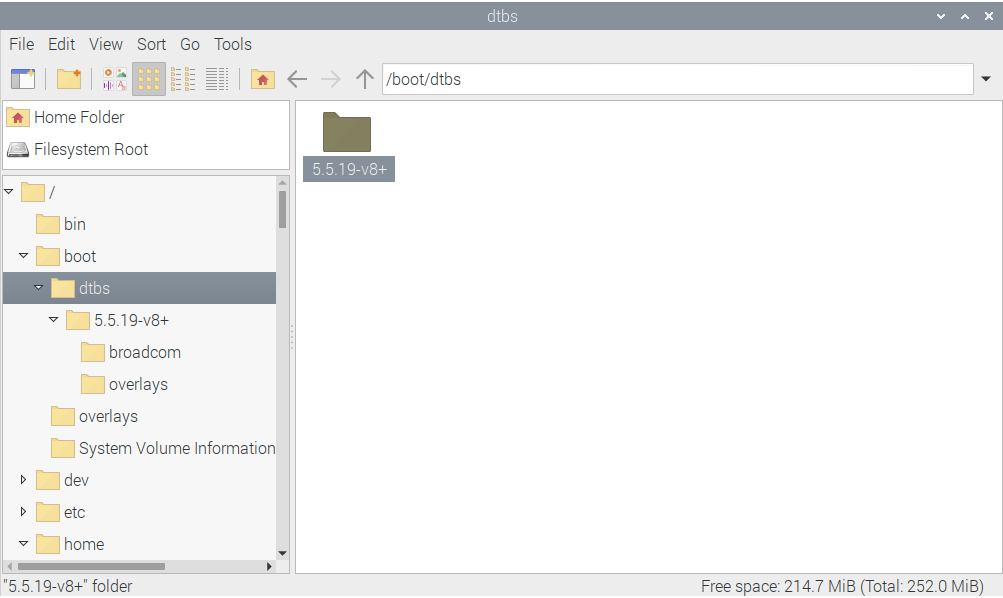
sudo make O=../kernel-out/ ARCH=arm64 CROSS_COMPILE=aarch64-linux-gnu- modules_install dtbs_installsudo cp ../kernel-out/arch/arm64/boot/Image /boot/kernel8.img
In File Manager, go to the path /boot/dtbs and note the version number. In this case it is 5.5.19-v8+.
Go back to /boot, and open the file config.txt

In config.txt, add the following lines to the end:
#Boot 64-bit kerneldevice_tree=dtbs/5.5.19-v8+/broadcom/bcm2711-rpi-4-b.dtboverlay_prefix=dtbs/5.5.19-v8+/overlays/kernel=kernel8.img
To go back to default kernel, simply comment out these lines.
If config.txt can’t be saved due to lack of permissions, open it with administrative rights from Terminal:
cd /bootsudo mousepad config.txt
Reboot the Raspberry Pi.
To confirm the Raspberry Pi is running the 64-bit kernel, the Terminal command “uname -a” should give an output similar to:

Enable Jumbo Frames
In Terminal, set the MTU to 9000 using the command:
sudo ifconfig eth0 mtu 9000Confirm that eth0 lists its MTU as 9000 using the command:
ifconfig eth0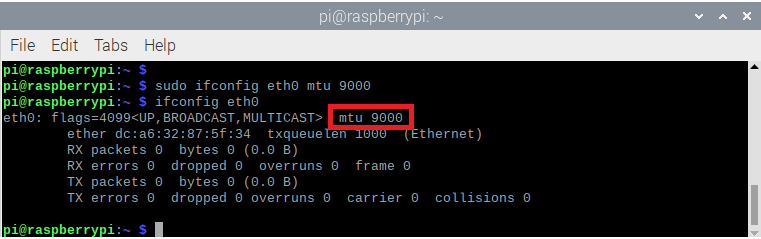
Jumbo Frames are now enabled on this Raspberry Pi.