Introduction
Sony’s new 4th generation “Pregius S” CMOS sensors are now available in LUCID’s Atlas10 and Triton line of cameras. This article will discuss the new features the 4th gen sensor has over previous generations – how they work, and how to use them in LUCID’s ArenaView software.
Dual ADC with On-Sensor Combination
Supported Cameras: Atlas10
The sensor can capture a low-gain and high-gain image on the same frame, and combine them to produce an HDR image. Dual ADC was introduced with the 3rd gen Pregius sensor, but combination had to be done externally. HDR allows an image to capture luminance and radiance more accurately to the real world, and performing the combination on-board makes implementation easier.
To activate this feature in ArenaView:
- Stop image acquisition
- Set ADC Bit Depth to 12-Bit
- Set Dual ADC Mode to Combined
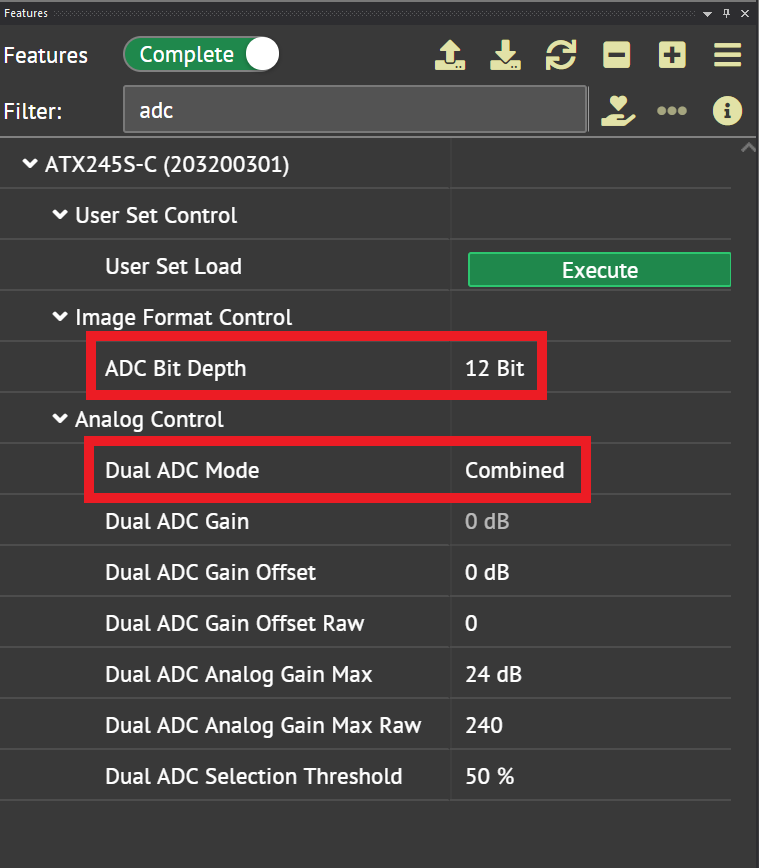
Additional Feature Descriptions
- Dual ADC Gain: The total amount of gain applied to the combined image
- Dual ADC Gain Offset: The amount of gain to apply to second ADC image
- Dual ADC Analog Gain Max: The maximum amount of analog gain to be applied to the combined image
- Gain Range: 0 dB to 30dB analog gain, 30.1 dB to 54 dB digital gain
- Dual ADC Selection Threshold: This threshold is used to select between the first and second ADC image for the combined output. The threshold is represented as a percentage of pixel intensity.
- If the data obtained by the second ADC image is greater than or equal to the selection threshold, the first ADC image is used for the combined output.
- If the data obtained by the second gain ADC image is less than the selection threshold, the second ADC image is used for the combined output.

Gradation Compression
After an ADC image has been selected for the combined output, gradation compression can be enabled to further optimize the image intensity.
To turn on this feature in ArenaView:
- Enable Dual ADC mode
- Set Gradation Compression Mode to Dual ADC
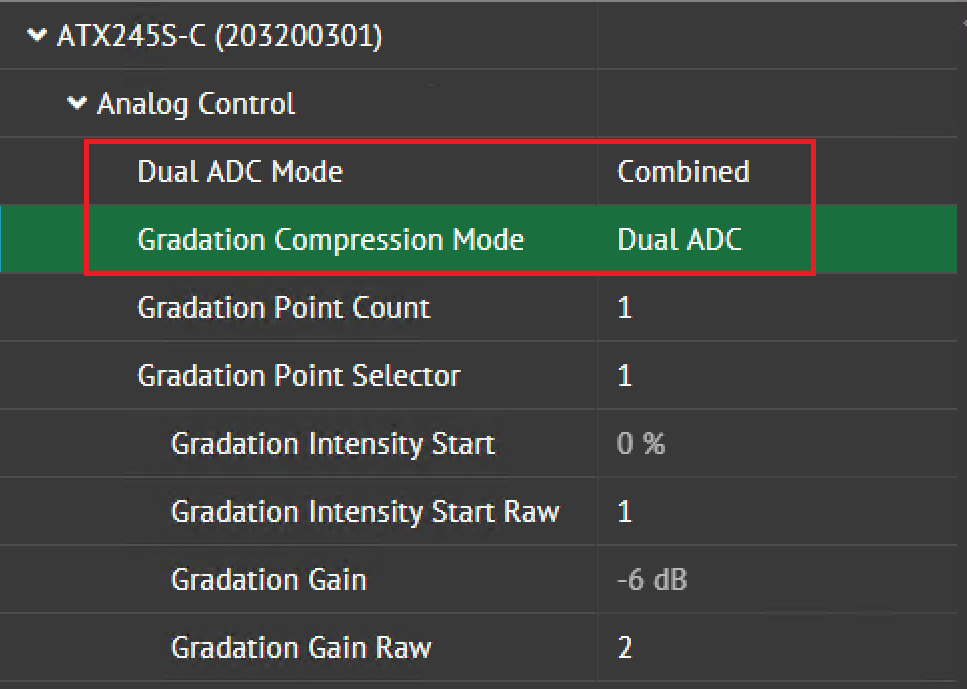
Additional Feature Descriptions
- Gradation Point Count: The number of kneepoints to use for the compression feature
- Gradation Point Selector: Selects the gradation kneepoint used for gradation compression
- Gradation Intensity Start: The pixel intensity threshold (represented as a percentage) above which the gradation settings will be applied for this point
- Gradation Gain: The amount of gain used to scale all pixel intensities above the Gradation Intensity Start

Short Exposure Mode
Short Exposure Mode can be used to set a short exposure time on the 4th Gen Pregius sensors. Please refer to the individual camera page to confirm the range for short exposure time.
To enable this feature in ArenaView:
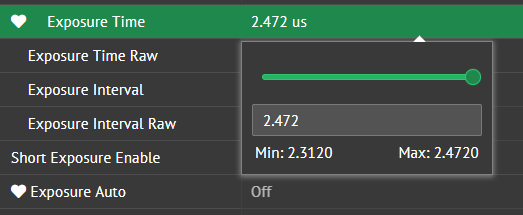
1. Set ExposureAuto to Off
2. Set ShortExposureEnable to true
3. Set ExposureTime to a value from the available range
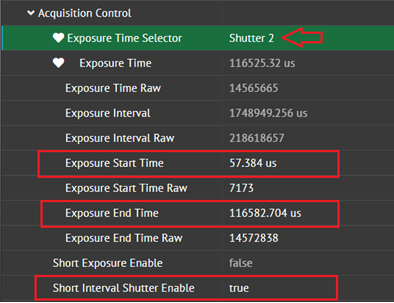
Short Interval Shutter Mode
Short Interval Shutter Mode can be used to acquire a set of 2 images as close as 2 microseconds apart (less than 1 frame) in a repeating pattern.

To enable on this feature in ArenaView:
1. Set ShortIntervalShutterEnable to true
2. Set ExposureTimeSelector to Shutter1
3. Enter a value for ExposureStartTime
4. Enter a value for ExposureEndTime (from a range between the lower limit and upper limit)
5. Select ExposureTimeSelector to Shutter2
6. Enter a value for ExposureStartTime
You will note that the minimum value for ExposureStartTime is the total sum of ExposureEndTime + ExposureInterval from Shutter1
7. Enter a value for ExposureEndTime

Exposure Time Monitoring
The sensor can output a signal mirroring the exposure duration. This can be used to confirm that image triggering and exposure are occurring as intended.
LUCID cameras already have this feature implemented as the Exposure Active line output mode. To enable this feature in ArenaView:
- Stop image acquisition
- Set Line Selector to Line2 (or Line1 or Line3)
- Set Line Mode to Output
- Set Line Source to Exposure Active
The above settings will produce an active high signal when the sensor is exposing and an active low signal in between exposures. If desired, setting Line Inverter to True will invert the signal.
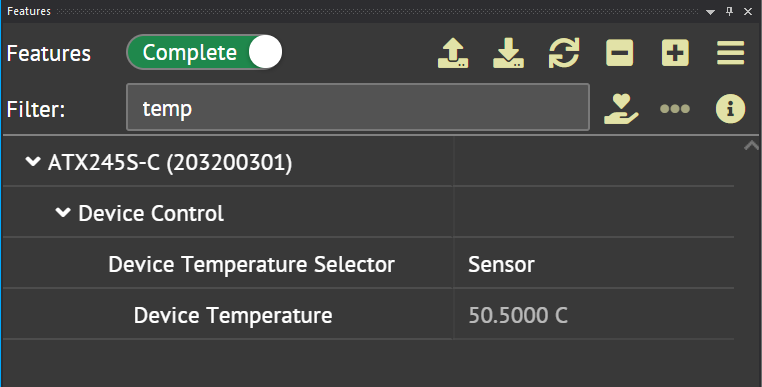
Improved On-Sensor Thermometer
The accuracy of the on-board thermometer has been improved for more precise measurements allowing for better thermal management. To view the sensor’s temperature in ArenaView:
- Set Device Temperature Selector to Sensor
- Read the value of the Device Temperature