This article will explain how to remove the IR cut filter from your color camera.
Supported Cameras: Phoenix, Triton, Atlas, Atlas10
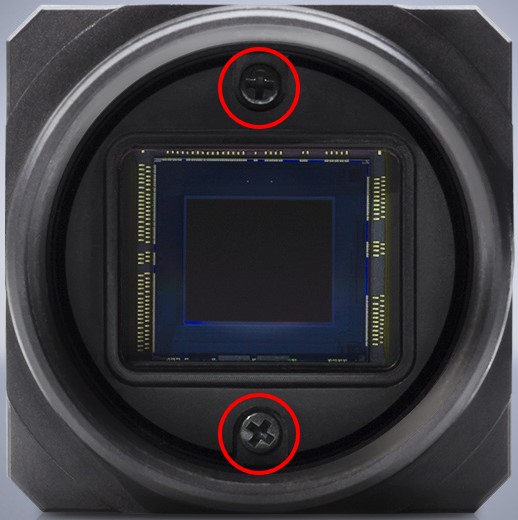
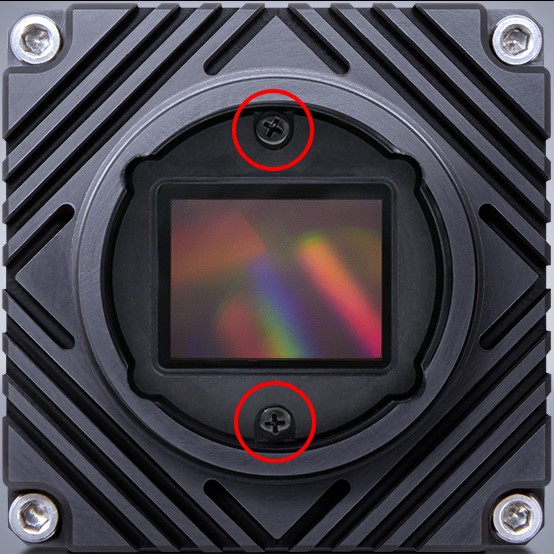
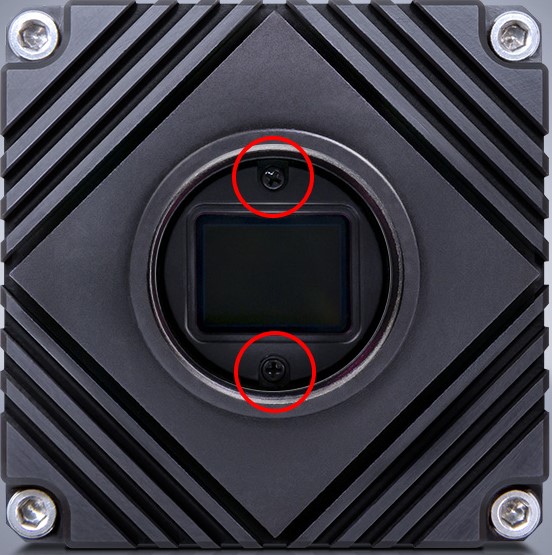
1. Remove the two screws at the front of your lens mount.
Phoenix

C-mount Phoenix front screw location

NF-mount Phoenix front screw location
Not applicable to S-Mount and No Lens Mount Phoenix models. These color models do not have an IR glass filter.
Triton

Triton front screw location
Atlas10 and Atlas

TFL-mount Atlas10/Atlas front screw location

C-mount Atlas10/Atlas front screw location
Not applicable to No Lens Mount Atlas models.
2. Carefully remove the gasket and IR cut filter.

Removing the IR cut filter will expose your camera’s sensor to dust or other debris. Do not remove the sensor cover window in front of your camera’s sensor. Removing this will damage the sensor and will void your warranty.